Sunday, September 23, 2012

Farm to Foodie


One of our family traditions is to go apple picking every year. For years, Matt and I would go on a weekend in the fall and load up on apples. We’ve continued that tradition with Eliana. 

Here are photos from her inaugural trip to the farm last year.
Don't worry, we didn't let her drive.
Apple picking October 2011

This year she was able to be a lot more involved in the picking!

Another family tradition: A photo of Eliana "driving."
Taking a snack break.
Family Fun!

Coming home with a bushel-full of apples inspired me to make a big batch of spicy applesauce to add to Eliana’s morning oatmeal. Here’s the original recipe I posted months ago and below is the “bulk” recipe. I put most of the applesauce into a container in the refrigerator to use over the next four days. I also filled three 2-ounce containers and put them in the freezer to use over the next three months.

Spicy Applesauce
·     6 apples, peeled and chopped (I used a mixture of Gala, McIntosh and Baldwin apples)
·     ¼ cup of water
·     Cinnamon and chili powder to taste
Put the chopped apples in saucepan large enough that they fit in an even layer. Add about half the water. Stir, cover the pan and heat the apples and water on medium-low heat. Let the apples simmer for around 10-15 minutes, stirring occasionally, until the apples are tender and smush easily with the back of a spoon. Add the cinnamon and chili powder and stir. Lower the heat, cover and let simmer another 5-10 minutes until the apples break down even more.

Happy Cooking!

Monday, September 10, 2012

Recipe for Vegetable & Cheese Strata


If you’ve been reading my posts about the teeny tiny foodie over the last several months, then you know that Eliana LOVES eggs. Since I make a lot of them, I’m always looking for new recipes using eggs. I’ve also been trying to make sure that I use all of our food before it goes bad and goes to waste. That may seem like an obvious goal, but for me it wasn’t always accomplished. I’d forget about produce in the fridge only to find it again after it was way past its prime. I hate the idea of wasting our money and also wasting food that someone else could have eaten. So, a strata is a perfect way to use left over veggies, cheese and bits of bread that no one wants to eat. So, what is a strata? A strata is a cross between a bread pudding and a frittata. Over the last few months, I’ve come across a bunch of different recipes to make a strata and it looked super easy. Just time consuming. So this weekend when I realized I had the heels of two loaves of bread in the back of the refrigerator, and I wasn’t trying to get a meal on the table ASAP, I figured it was time to finally try making a strata. 

The recipe I used as my guide was for a Spicy Strata by Aida Mollenkamp. I found it online. And, in the spirit of “using rather than losing,” I didn’t go out and buy the various vegetables, herbs and cheeses she used in her recipe. Instead, I used what I already had in the refrigerator.  Below is the recipe I created using hers as a “mentor recipe.”

Vegetable & Cheese Strata 
This is a 3-part recipe. Part 1 is prep time and takes only around 15 minutes. Part 2 is the resting time. The strata needs to rest in the fridge for at least an hour and up to 12 hours so the bread gets soaked through and the flavors meld together. Part 3 is the baking time. It takes 40-45 minutes to bake in the oven.
·     3-4 scallions, white and light green parts only and thinly sliced
·     1 ear of fresh corn, kernels scraped off
·     A large handful of either cherry or grape tomatoes, cut into quarters
·     5 egg whites and 3 whole eggs
·     A splash of organic whole milk
·     2-3 heels of sliced bread, cut into 1-inch chunks
·     A small handful of parsley, finely chopped
·     A few sprigs of rosemary, finely chopped
·     1 ½ cups of shredded mozzarella and shredded Parmesan cheese, mixed and divided into thirds
·     An additional ¼ cup of shredded Parmesan, set aside
·     ¼-½ cup fresh mozzarella, chopped into chunks
·     Unsalted butter, salt, pepper, chili powder to taste

Part 1: Preparing the Strata
Butter an 8x8-inch baking dish. Heat butter over medium heat and add scallions. Stir. After about 1 minute, add the corn kernels and tomatoes and stir. Cook for around 1 minute more and remove from heat. Into a medium-sized bowl, put the eggs/egg whites, milk, salt, pepper and chili powder. Whisk. Put half of the bread chunks onto the bottom of the baking dish creating an even layer. Top the bread chunks with half of the corn mixture, half of the chopped herbs and ⅓ of the shredded cheese mixture. Pour half of the egg mixture over the dish. Drop ⅓ of the fresh mozzarella chunks over the egg. Repeat the layers with the rest of the bread, corn mixture, herbs, ⅓ of the shredded cheese mixture, eggs and ⅓ of the fresh mozzarella. Top with final ⅓ of the shredded cheese mixture and remaining chunks of fresh mozzarella. Push down on the top of the strata to make sure all of the bread is covered. Cover the dish with plastic wrap. Place a plate on top of the baking dish and put a 1-2 pound weight on top of it. A 28-ounce can of tomatoes works perfectly.

Part 2: Resting time:
Refrigerate for 1-12 hours. I left it overnight for around 9 hours.

Part 3: Cooking the strata:
Heat the oven to 325°. Remove the strata from the refrigerator and let it sit at room temperature for at least 20 minutes. Top the strata with the reserved shredded Parmesan cheese. Cook the strata, uncovered and on the middle rack, for 40-45 minutes.
Let cool slightly before serving.

Happy Cooking!


Looks yummy, right?

See all the layers?

Hmm. What's this?

Bread, cheese and eggs all in one? Sounds like my kind of meal!

I'm too busy eating to look at you!

Tuesday, September 4, 2012

Foodie Fun


Typically during a meal, Eliana and I sit at the table and she feeds herself off her tray. We “talk” about what we are eating, what’s been happening that day or upcoming events. But, sometimes we get a little goofy and silly. At times, I even let her play around a little bit while she eats. I will let the pictures below tell most of this story.

Lately, she has been really excited about her new high chair and likes to explore it, even when she isn't eating. Sometimes these explorations continue into mealtime. Thankfully, the baked chicken she was eating in this series of photos (recipe below) wasn’t going to leave any stains anywhere. Come on, you think I’d let her roam around while eating something like blackberries or salsa?  
Puh-lease!

Here I come!
Bite break!
I know, Mommy. I need to make sure I swallow so I don't choke. Sheesh!
Is she looking?
Peekaboo!!!!!
Hmm, let me try something here.
Maybe a little redecorating.
Oh yeah, later Mommy!

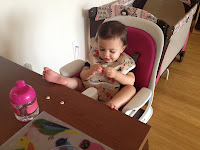
One thing we love about the new high chair is that Eliana is now at the perfect height to be able to sit at the table with us and she doesn’t need to use the tray. This will be perfect when she gets a little older and eats off a plate. For now though, it isn’t realistic. I don’t like the idea of putting most of her food directly onto our fake-wood table. And using those plastic table covers we use at restaurants is really wasteful four times a day. But, sometimes, depending on what she is eating, I forego the tray altogether or pull her up to the table. And that means Eliana gets to lounge a bit as she eats. Take a look at my classy little girl.

What? Can't a gal relax and enjoy her snack?
Hee hee! I LOVE putting my feet up on the table.
I know, I know. Don't get used to it.
Maybe if I stop looking at her she will let me snack in peace.

How can I raise a teeny tiny foodie if we don’t have fun with our food, right?

Baked Chicken Breasts
·     4 chicken breasts, rinsed and patted dry (I like Murray's brand)
·     Juice of one lime
·     Olive oil to taste
·     Salt, pepper, garlic powder and chili powder to taste all mixed into a small dish
Heat the oven to 365°. Pour a little bit of olive oil into a baking dish and put the chicken in, one breast at a time, and rub it around in the olive oil. (I use a fork to do this so I don’t have to touch anything.) Do this on both sides. Squeeze the lime juice onto both sides of the chicken breasts, too. Finish each side with the spice mixture. Bake for around 30-35 minutes. Turn the broiler on low-heat and cook for 3-5 minutes more so the top is golden.


Happy Cooking!


My blog has moved!

You will be automatically redirected to the new address. If that does not occur, visit
http://www.teenytinyfoodie.com
and update your bookmarks.